Here is a step by step guide on how to upload and submit your exam recording, your candidate ID confirmation and your list of items.
Before you record and submit your exam, please read our [PDF] Quick Guide to filming your LCME Digital Recorded Exam.
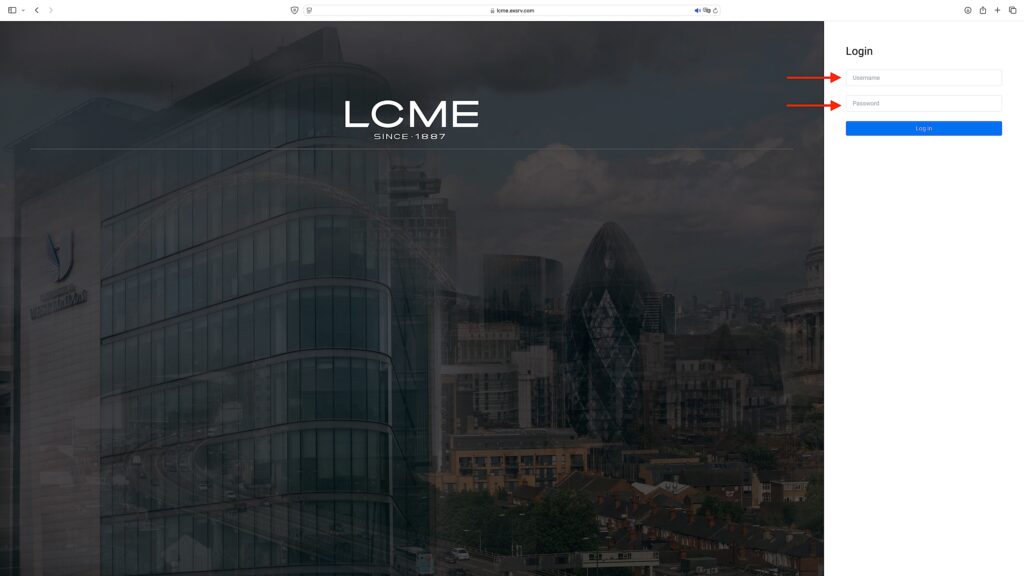
01. Login
Go to lcme.exsrv.com and log in using the unique username provided for the candidate profile and the candidate’s date of birth (in format DD/MM/YYYY) as the password.
You can find the login details for the candidate profile in the confirmation email you have received after the booking.
The username comprises a shortened version of your name, followed by a hyphen and an 8-character unique code
(e.g. johndoe-8b7m52sd).
If you cannot log in and see an error message “Invalid Login”, please double check that you are using the exact login details as provided. Common issues include:
- adding extra spaces when copying the login details
- omitting slashes ( / ) in the date of birth used as the password.
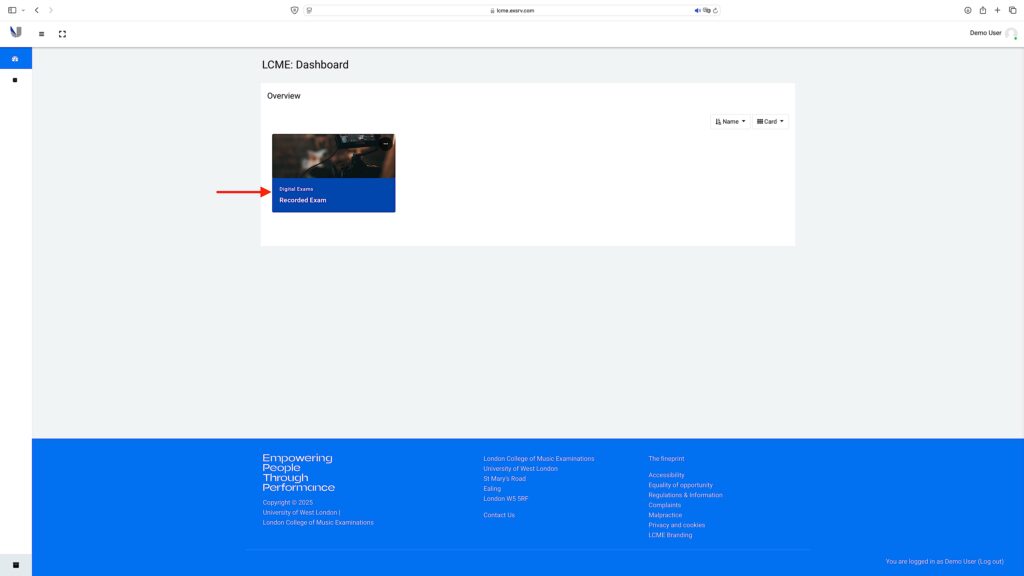
Once logged in, you will see your Dashboard. Click on your exam to proceed to the exam page.
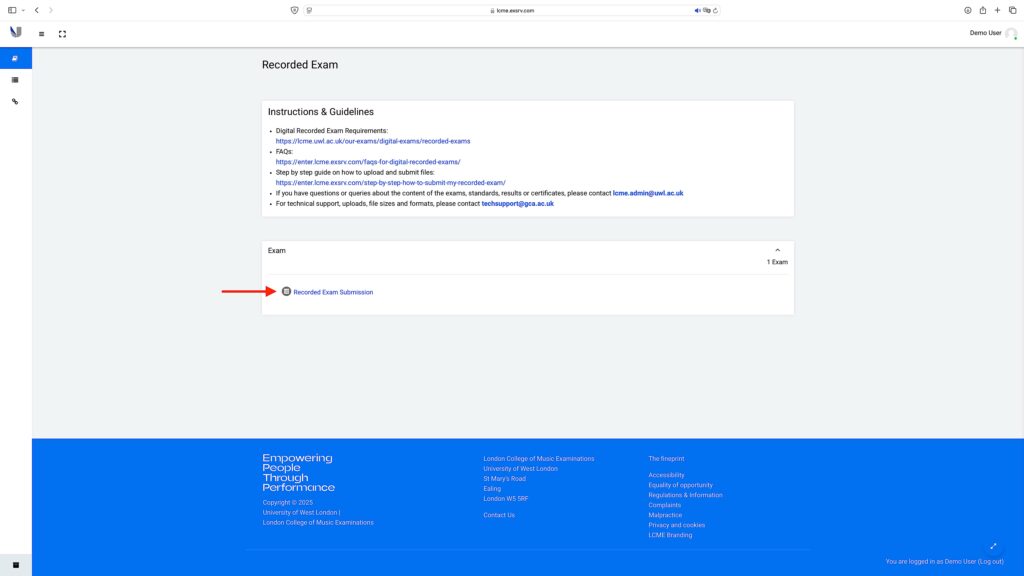
02. Exam Page
On the exam page, click the “Recorded Exam Submission” link to continue.
03. Submission & Upload Page
Click the “Add submission” button to begin your submission.
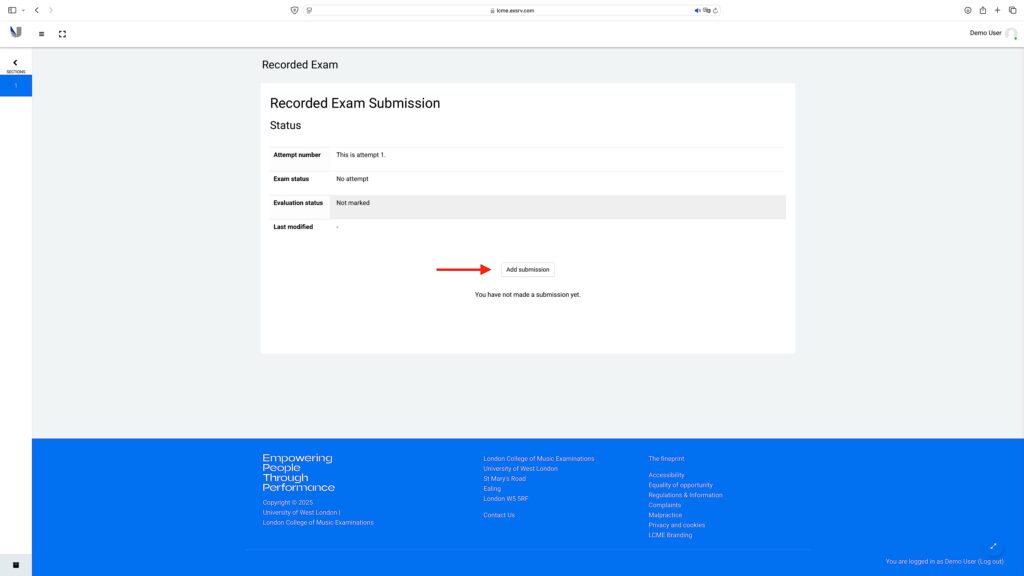
The Submission Page contains instructions on which files need to be uploaded and what information must be included in the Submission Information Box. Read the instructions in the grey and blue boxes carefully. For detail, please refer to the current exam requirements / syllabus published on the LCME website.
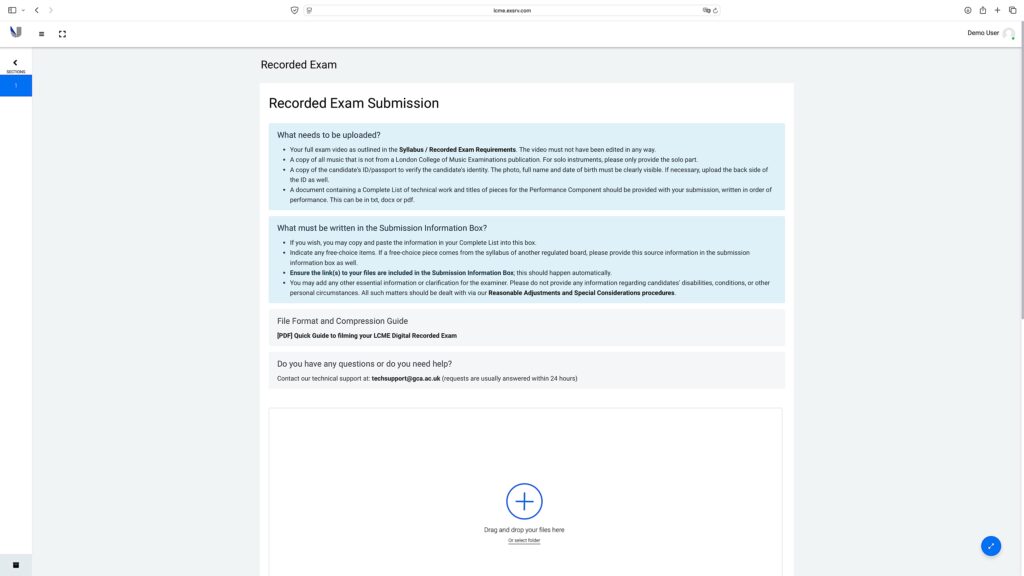
04. Upload Files
- Laptop/Desktop Users: You can “drag and drop” files into the upload area or click the “+” sign / the “select folder” link.
- Tablet/Smartphone Users: Tap the “+” sign to select multiple files directly from your camera roll/gallery.
Important:
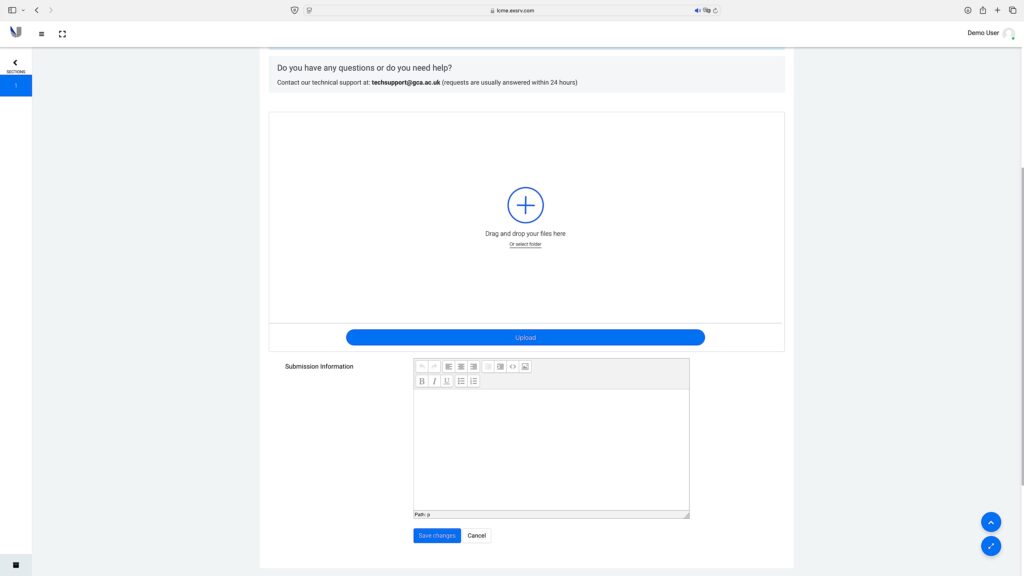
- Ensure you upload your exam video and all other required documents as outlined in the syllabus.
- The total file size must not exceed 1 GB (1000 MB). If needed, convert and compress your files
(see Quick Guide to LCME Digital Recorded exams for guidance).

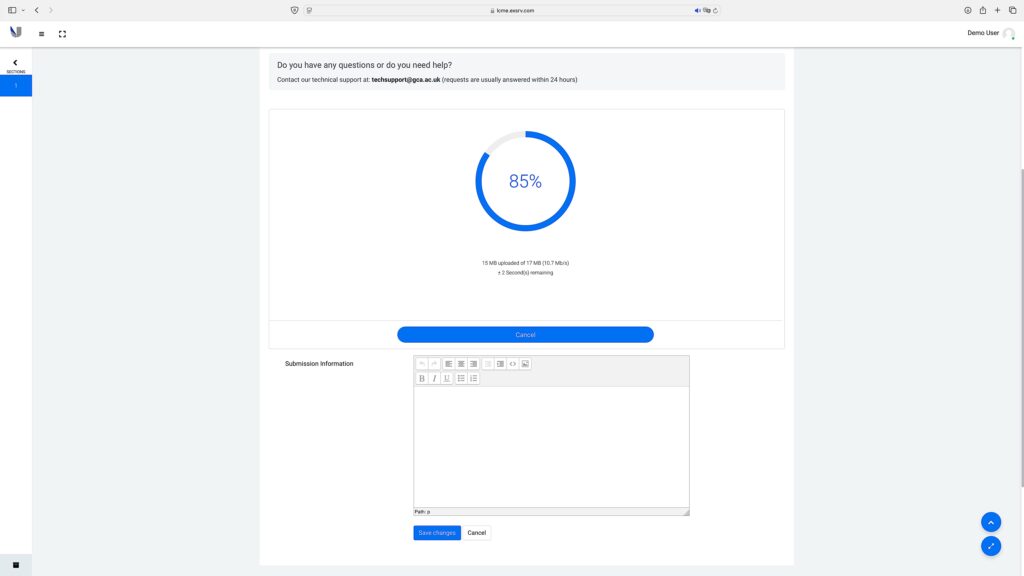
After selecting your files, click the “Upload” button. The upload status will be displayed.
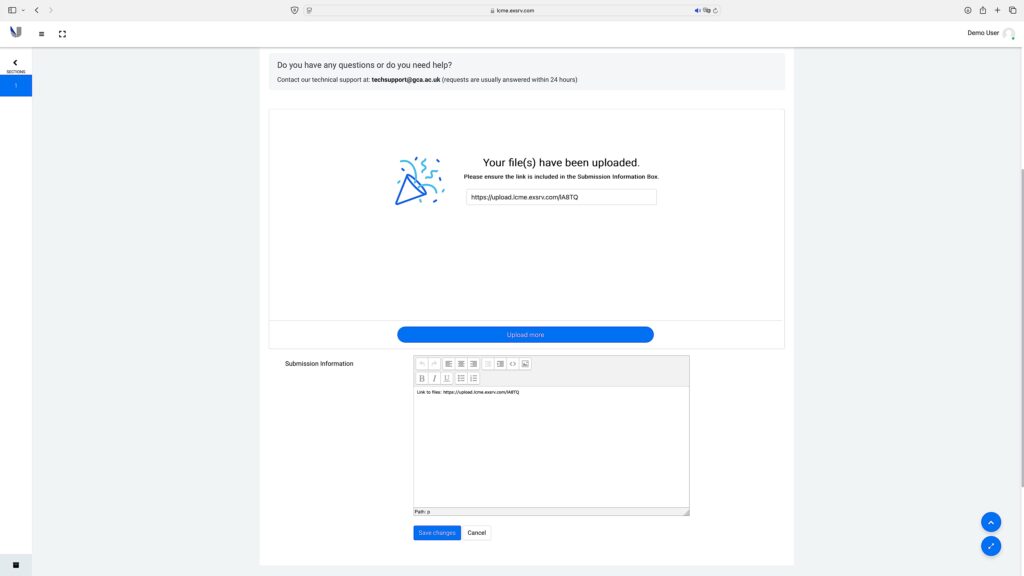
Once the upload is complete, you will see a success message and a link to your uploaded files.
Ensure the link(s) to your files are included in the Submission Information Box. This should happen automatically. If not, copy and paste the link manually.
05. Submission Information Box
Fill in the Submission Information Box with the following details:
Your full name, subject and level, list of components/pieces in performance order, for example:
[link to your files]
John Doe
Piano Grade 5Technical Work
List A, Title, Composer
List B, Title, Composer
List C, Title, Composer
DiscussionID document
Note:
You do not need to include excessive details or write an essay. Provide clear information for the examiner to understand who you are and what you are performing. Optional comments about specific pieces or parts of your work are welcome but will not affect the assessment.
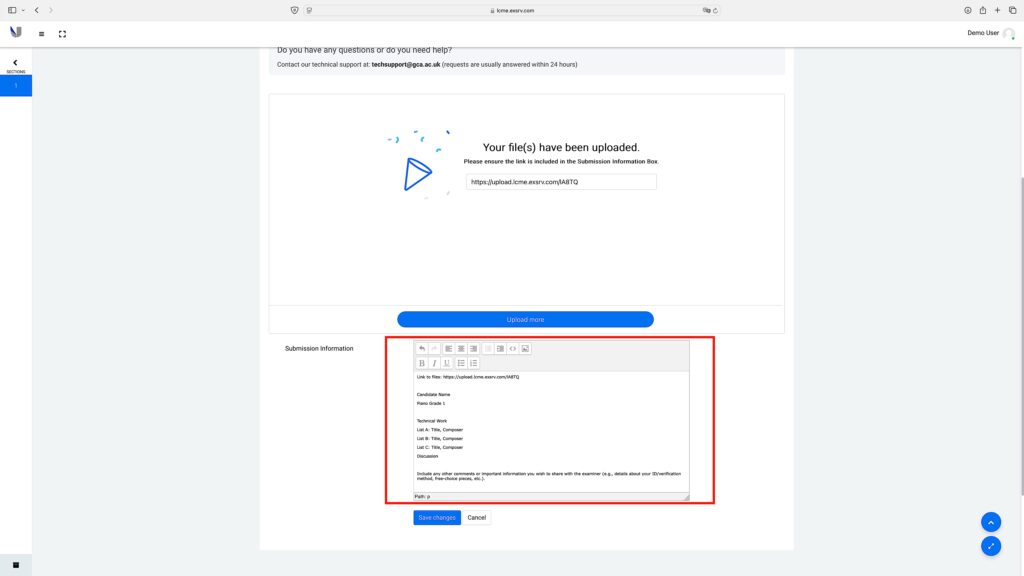
Double-check that all requirements are met and confirm the link to your uploaded files is included.
Click the “Save changes” button to proceed.
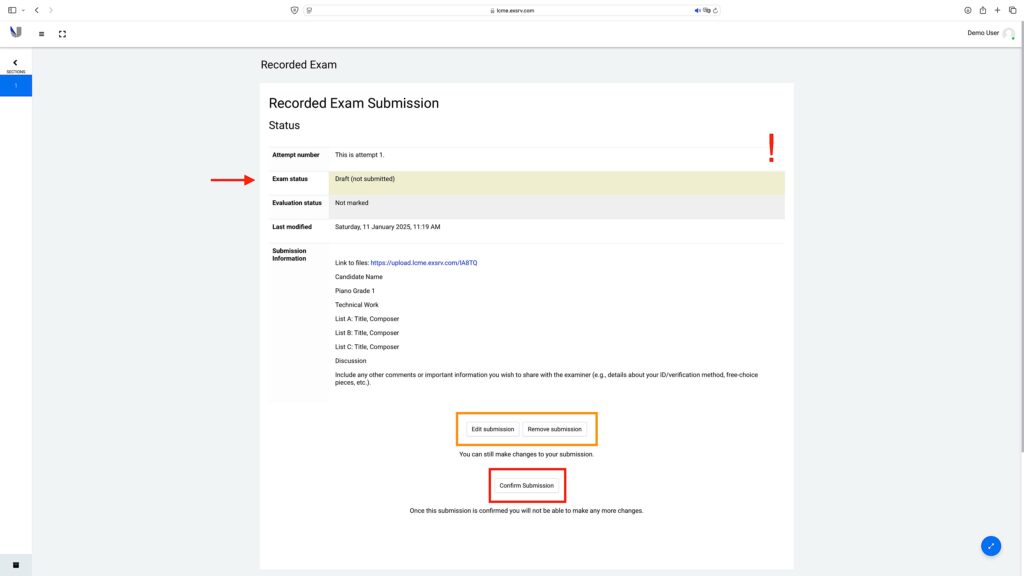
06. Submission Saved as Draft
Your submission is now saved as a draft. At this stage, you can:
- Make changes by clicking “Edit submission”.
- Remove your submission entirely by clicking “Remove submission” if you need to restart.
When you are ready to finalise, click the “Confirm Submission” button.
Note: After this stage, no further edits can be made.
07. Confirm Your Submission
To confirm your submission and send it to the examiners for marking:
- Tick the declaration checkboxes to confirm that all files and information are in place.
- Click the “Continue” button to complete the submission process.

08. Submission in the Marking Queue
Congratulations! You’re done.
Your submission is now in the marking queue. Examiners will be notified, and you can log in to your profile at any time to:
- Review your submission.
- Check for feedback or results from the examiners.
You will receive an email notification when the status of your submission changes (e.g., when your results are released).
